
| Version 5 (modified by , 5 years ago) ( diff ) |
|---|
Software Defined Radios - What are they?
A software defined radio (SDR) is a radio which can modulate and demodulate radio signals through software commands provided by a computer.
When should I use one?
Software defined radios can be used in any radio application. The Epiq Sidekiq Z2 used in this testing can tune to any frequency between 40Mhz and 6Ghz. That covers a lot of air, below FM radio to above standard Wi-Fi signals can be analyzed with this hardware.
Who is Epiq?
From their website, "Epiq Solutions develops cutting edge tools for engineering teams and government-focused organizations requiring situational awareness and detailed insight into their RF environments in order to identify and act against wireless threats". Not only that they're nice guys, we know because we have worked with them for a long time. Check out their web page - https://epiqsolutions.com/
Configuring the Epiq Sidekiq Z2 to work with Gateworks
Materials required:
- Gateworks SBC with latest Gateworks-Ubuntu image installed (In this testing GW6300 was used)
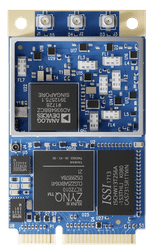
- Epiq Z2
- Two antennas
- Serial Console and network connections to the Gateworks SBC
The Z2 can be used independently of Gateworks products with its (included) USB adapter. Before connecting your Z2 to a Gateworks board it's best to verify it's functionality and check that your antenna connections are being made correctly. If you will be using ERA now is a good time to install it.
Hardware configuration
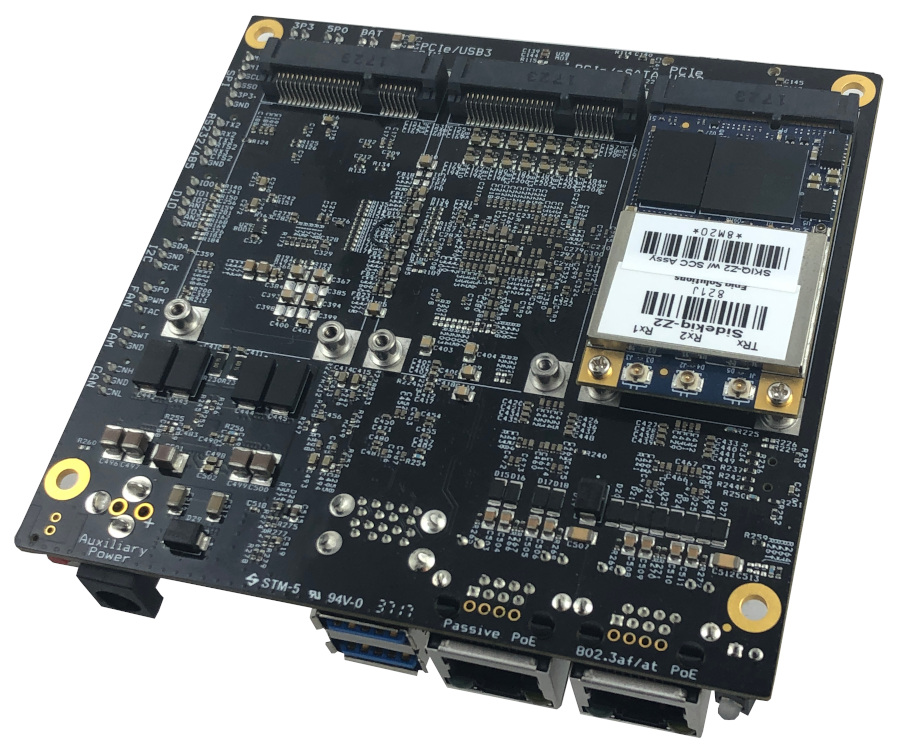
Attach the Z2 to the Gateworks SBC in any slot where USB signaling is provided.
Verify antennas are attached to RX and TX U.FL connectors on the Z2.
Software configuration
Follow the instructions here to enable "root" access via SSH. This requires using the serial console.
With that done log into the Gateworks via SSH as root.
Now access the Z2 via serial console from the Gateworks SBC
screen /dev/ttyACM0
Username "root" Password "epiq"
Execute the following commands to switch the SDR into USB-CDC mode for Linux
fw_setenv udc_config_mode 1
reboot
After the SDR had completed its power cycle log back in and verify the changes have been made:
fw_print_env udc_config_mode
#udc_config_mode=1 will be displayed
Exit screen "ctrl + a", ":", "quit"
Verify a network interface has been created, for this testing it is named eth2
root@focal-newport:~# dmesg |grep cdc_ether
[   12.619443] cdc_ether 3-1:1.0 eth2: register 'cdc_ether' at usb-0000:00:11.0-1, CDC Ethernet Device, 00:e0:22:01:7d:15
[   12.619589] usbcore: registered new interface driver cdc_ether
root@focal-newport:~# ls /sys/class/net/
can0  eth0  eth1  eth2  lo
Assign the interface a DHCP address:
dhclient eth2
If config will show eth2 with the address 192.168.3.9, counterintuitively SSH connections can be made to the Z2 at the 192.168.3.1 address "ssh root@192.168.3.1"
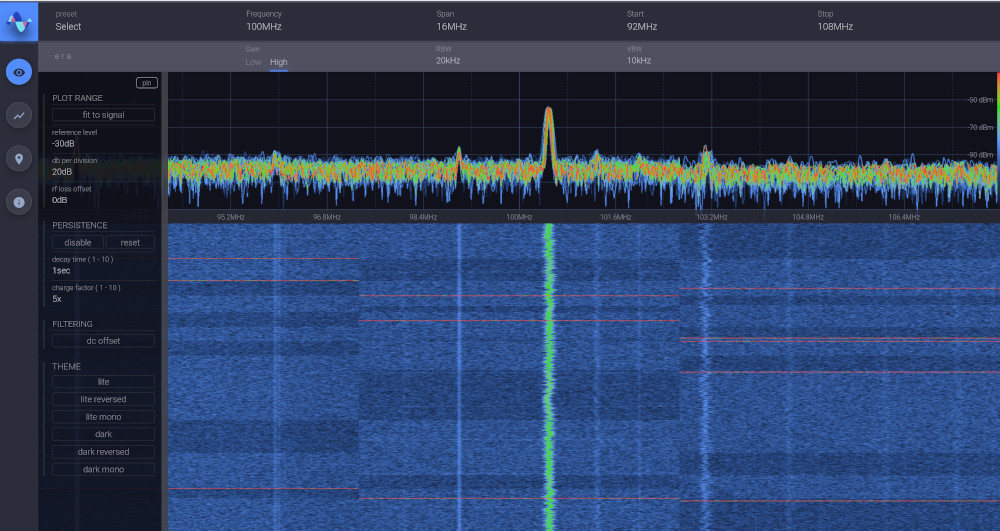
ERA
ERA is Epiq's proprietary RF analyzer software. Check it out here
Install Epiq ERA software on the Z2, instructions and files provided by Epiq.
Launch ERA and allow the shell to run
Port forwarding using nftables to access ERA from your workstation
Nftables allows packets to be forwarded from the Gateworks network interface to the Z2 interface and back out to an external network. This will allow access to the ERA web interface from a desktop workstation browser
Install nftables and start the service
apt install nftables -y
systemctl enable nftables.service
systemctl start nftables.service
Check if ip forwarding is enabled, by default it is not.
root@focal-newport:~# sysctl net.ipv4.ip_forward
net.ipv4.ip_forward = 1 #0 is disabled
To enable ip forwarding
sudo sed -i 's/#net.ipv4.ip_forward=1/net.ipv4.ip_forward=1/g' /etc/sysctl.conf
sudo sysctl -p
Configure nftables by copying these commands individually, replace 192.168.0.1 with the IP address of the interface on the Gateworks which is connected to your network (the same used for connecting with SSH)
nft flush ruleset # clear existing rule set
nft add table nat

nft 'add chain nat postrouting { type nat hook postrouting priority 100 ; }'
nft 'add chain nat prerouting { type nat hook prerouting priority -100; }'

nft 'add rule nat prerouting ip daddr 192.168.0.1 tcp dport { 3000 } dnat 192.168.3.1:3000'

nft add rule nat postrouting masquerade
Verify your changes
nft list ruleset
Make the ruleset persistant
nft list ruleset | tee /etc/nftables.conf
Open a web browser on your workstation, connect to the running ERA server by typing 192.168.0.1:3000, really <the Gateworks IP>:3000
Enjoy ERA from your workstation.
Attachments (4)
- sdr-small.jpg (188.2 KB ) - added by 5 years ago.
- sdronboard.jpg (259.2 KB ) - added by 5 years ago.
-
sidekiqz2.png
(18.8 KB
) - added by 5 years ago.
Epiq Sidekiq
- epiqlogo.png (9.9 KB ) - added by 5 years ago.
Download all attachments as: .zip