
| Version 20 (modified by , 4 years ago) ( diff ) |
|---|
Gateworks Newport GW6903 SBC w/Google Coral TPU Machine Learning (ML) Accelerator for AI — What is it?

This demo features a Gateworks Newport GW6903 Rugged Single Board Computer (SBC) running the Google Coral Edge Tensor Processing Unit (TPU) Mini-PCIe card.
The Coral TPU provides a means to perform advanced Machine Learning (ML) tasks in a low power, small form factor, Mini-PCIe card. The TPU Accelerator is based on a custom "Application Specific Integrated Circuit" (ASIC) that Google designed for hardware accelerated AI calculations. The TPU features the following:
- Performance: 4 TOPS (Trillion Operations Per Second)
- Power: 2 Watts Typ, 4 Watts Max
- Half-size Mini-PCIe Form Factor (PCIe Gen2 x1)
- Supported Framework:TensorFlow Lite
- Works with AutoML Vision Edge
- -20 to +70C Operating Temperature
- Buy Coral TPU on Coral Website
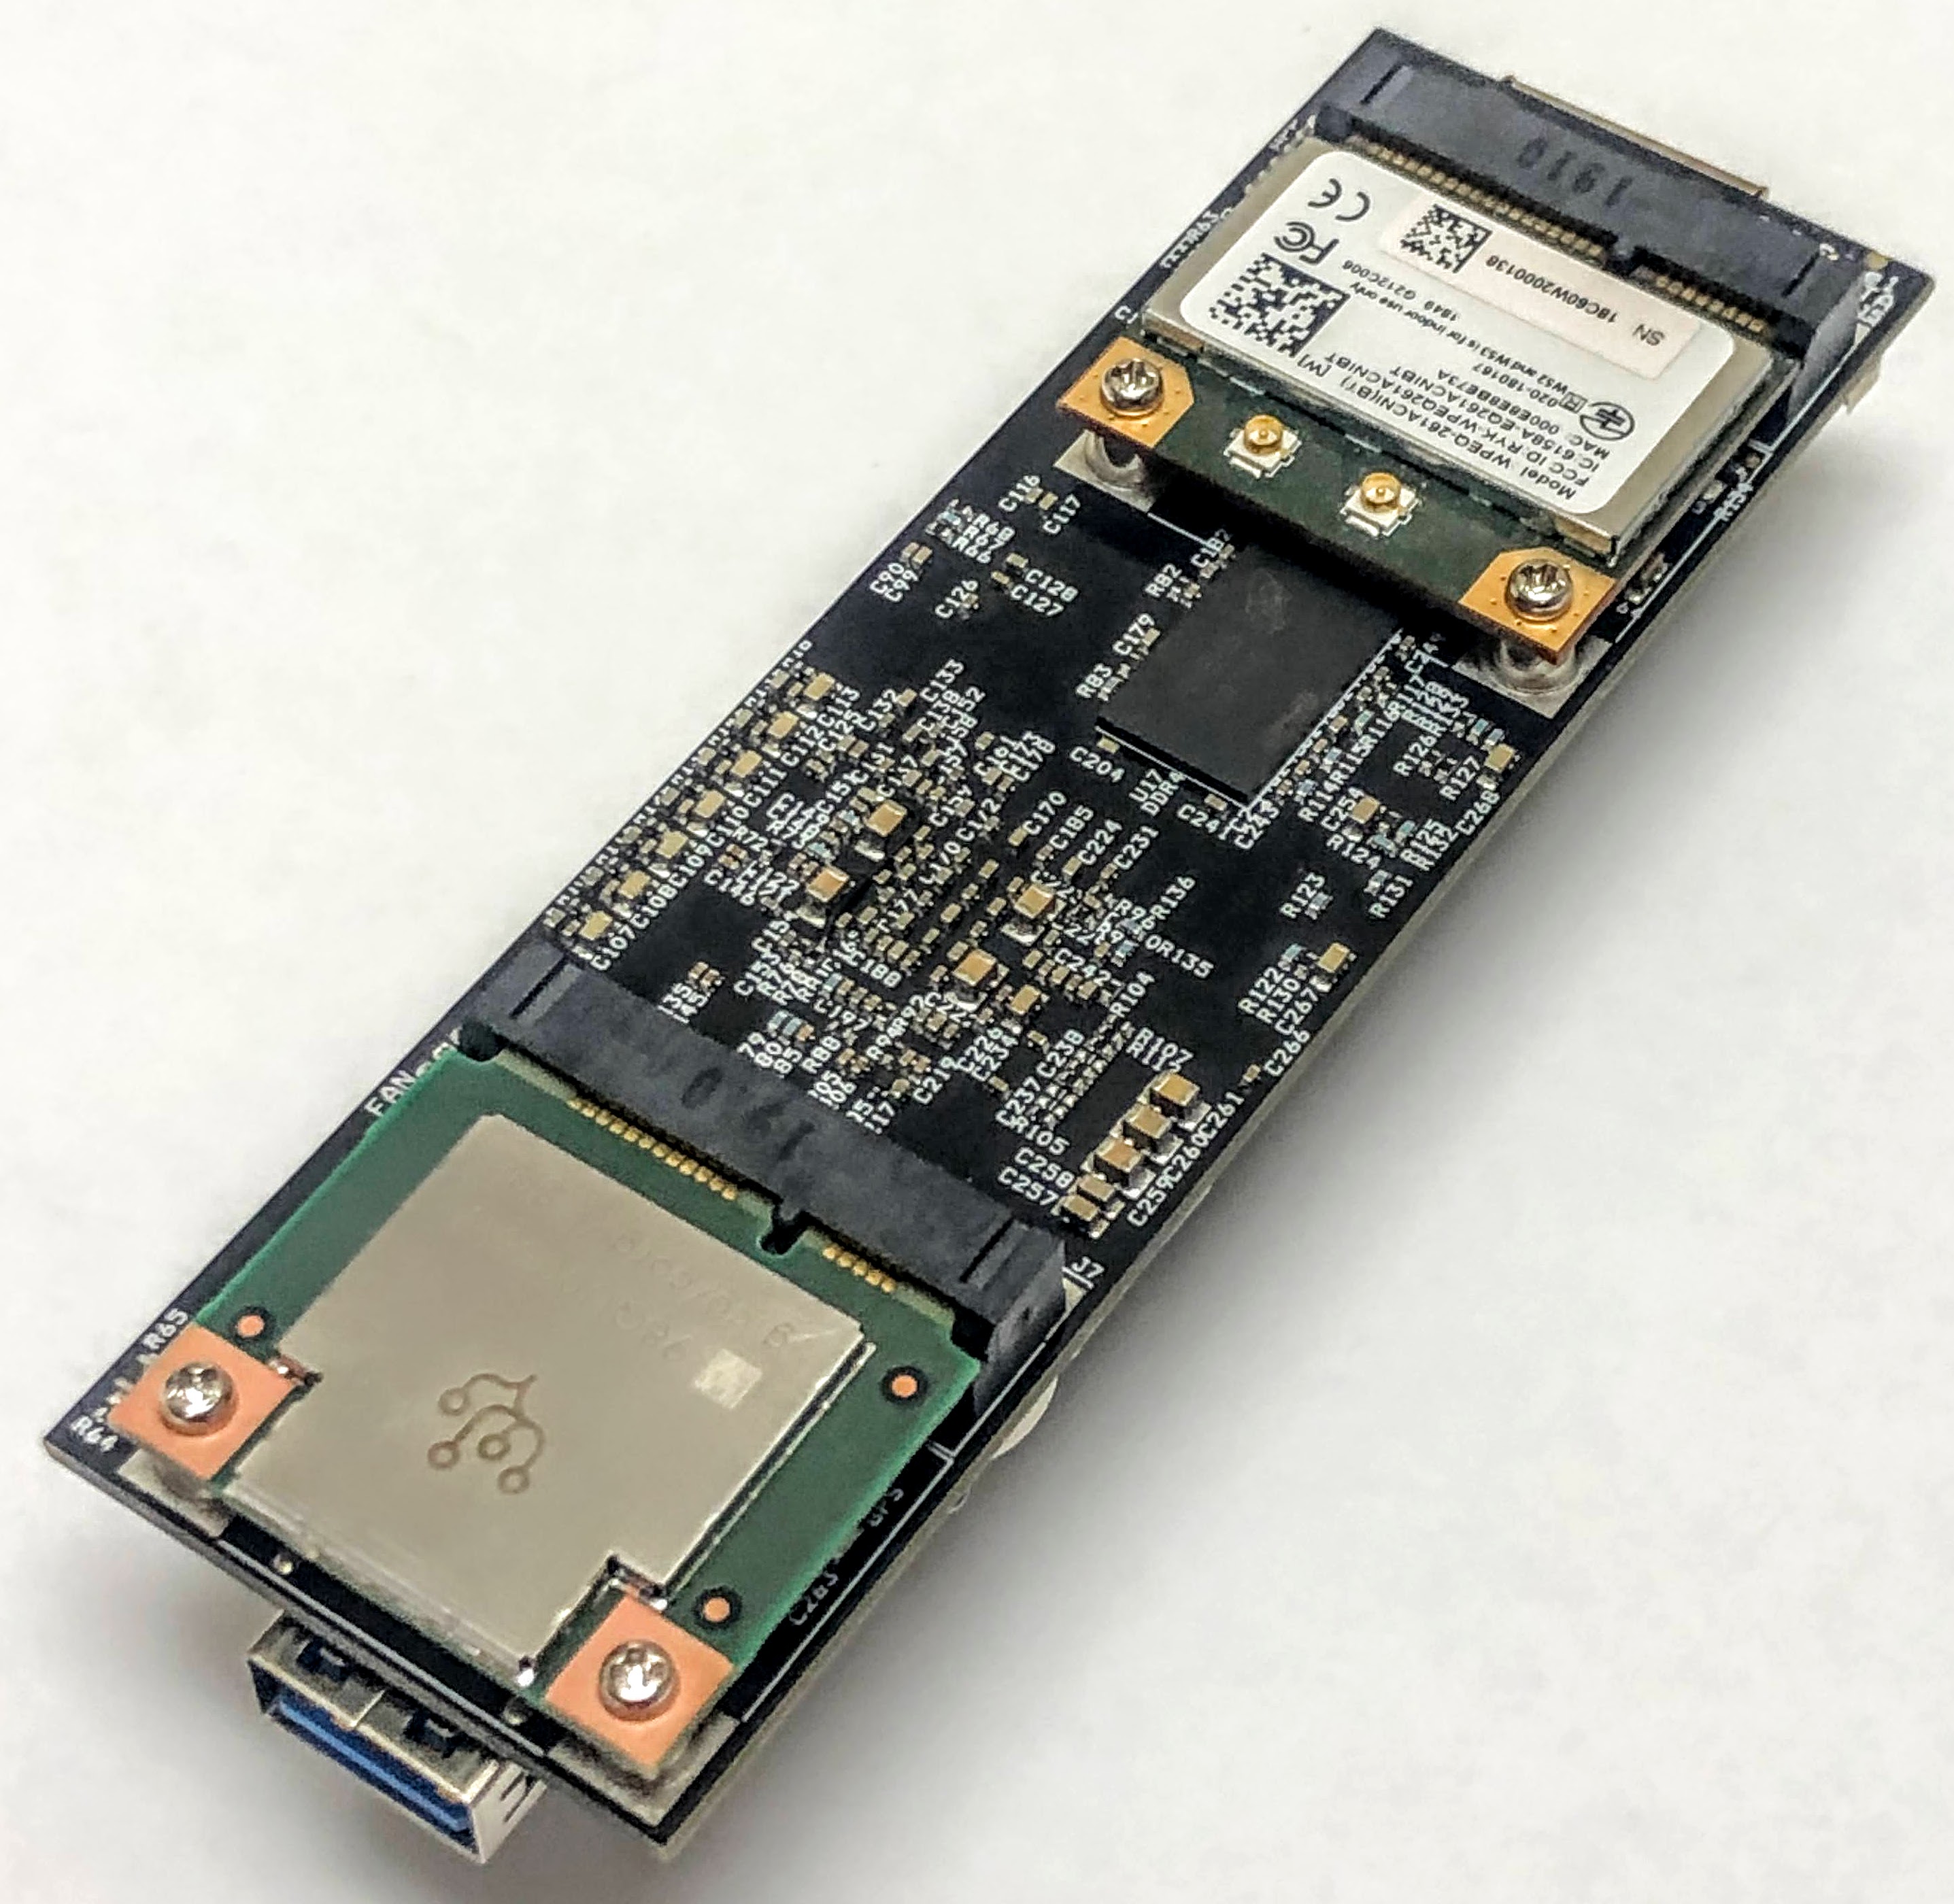
The Gateworks Single Board Computer platform is an ideal fit for the Google Coral TPU Mini-PCIe card, especially because it supports half sized cards.


The above image shows the Google Coral TPU card in the more left Mini-PCIe slot on the bottom of the GW6903 SBC and a wireless radio in the more right upper slot
This TPU is appropriate for an application where identifying an object or pattern is required. This could be, but is not limited to:
- Object detection
- Pose or gesture estimation
- Image segmentation
- Key phrase detection
Some practical applications are:
- Autonomous vehicles
- Robots
- Voice control/Language Processing
- Monitoring devices
Nearly all industries can benefit from this technology. To name a few more specifically:
- Health Care
- Agriculture
- Manufacturing
- Oil and Gas
- Security/Defense
- Automated Kiosk
For more information on the Google Coral TPU Mini-PCIe card see the following links:
- https://coral.ai/products/pcie-accelerator/
- https://coral.ai/docs/m2/get-started/
- https://coral.ai/docs/mini-pcie/datasheet/
- https://coral.ai
- https://en.wikipedia.org/wiki/Tensor_processing_unit
Getting started with the Coral Edge TPU
To begin you will need:
- A workstation with Linux natively installed.
- A Newport SBC — Coral requires AARCH64.
- A Coral EDGE TPU, our testing was done with the mPCI-e form factor model.
- Network/Internet connection.
- Optional: USB webcam
Compiling the kernel
The Gateworks kernel defconfig for Newport does not include support for video devices. For the sake of convenience a pre-built image is available for download. If you would like to create a similar image manually:
- Acquire the Newport BSP, we will call the directory this repo has been sync'ed to the <BSP> directory.
- Follow the steps here to modify the kernel and create and Ubuntu image.
- In the menuconfig enable the module "USB_VIDEO_CLASS", this will allow you to use a USB webcam with v4l-utils.
- Complete the procedure detailed in the aforementioned section, build your Bionic image and flash it to your SBC
- Though it was not specifically created to address using the Newport BSP this video may provide some insight into the process of changing the kernel config. https://youtu.be/XCkegC05xXY
Building and installing the Gasket and Apex modules
Video: https://youtu.be/PcrGUiuNBcg
The source code for the modules can be downloaded here as a tar.gz file:
- https://coral.googlesource.com/linux-imx/+/refs/heads/release-day/drivers/staging/gasket
- Extract this tar into a directory, this dir will be referred to as <the_module_directory>.
Build the source using the same method as you would for an out of tree module (out of tree = when the module source is not included in the kernel source).
- cd to the <BSP> directory.
-
source setup-environment- Doing this will configure the toolchain for building. Keep in mind some of the lines in this file use the argument $PWD thus it should not be sourced from any location other than the <BSP> folder.
- You can verify the arguments have been exported by executing the command
echo $ARCH
This will return "arm64"
- cd to <the_module_directory>
- cat the "Makefile", you'll see two variables which need to be set for the modules to build correctly.
export CONFIG_STAGING_GASKET_FRAMEWORK=m
export CONFIG_STAGING_APEX_DRIVER=m
- Execute the following command
make -C <BSP>/linux M=$PWD
This procedure will result in two modules being created, "apex.ko" and "gasket.ko". Copy the .ko files to your target board "/lib/modules/<kernel_version>/extra/" folder. Using SCP may be the simplest way to go about this.
With the modules copied to the board execute the following commands:
depmod -a
insmod gasket.ko
sync
Remove power from the board and reboot. On reboot verify that "/dev/apex_0" device is present.
Installing and configuring Python
Python 3.7 is required to run the tenser flow examples. Other versions can be used, though at the time of writing this wiki 3.7 is the best option when using the Bionic Ubuntu for Newport BSP.
apt-get update
apt install python3.7 -y
Set Python 3.7 to have priority over 3.6.
update-alternatives --install /usr/bin/python3 python3 /usr/bin/python3.6 1
update-alternatives --install /usr/bin/python3 python3 /usr/bin/python3.7 2
update-alternatives --config python3
#on this menu enter the number 2.
You can verify you have been successful in changing the version with the following command:
python3 --version
Installing the TPU runtime
Install Curl
apt-get install curl -y
Add Debian package repository to your system
echo "deb https://packages.cloud.google.com/apt coral-edgetpu-stable main" | sudo tee /etc/apt/sources.list.d/coral-edgetpu.list
curl https://packages.cloud.google.com/apt/doc/apt-key.gpg | sudo apt-key add -
sudo apt update
Install PIP and required libraries
apt-get install python3-pip libedgetpu1-std -y
pip3 install --upgrade pip setuptools wheelpi
Download the TFlite Runtime .whl
wget https://dl.google.com/coral/python/tflite_runtime-2.1.0.post1-cp37-cp37m-linux_aarch64.whl
Note: If you have chosen not to use Python 3.7 you can find the .whl appropriate for your version here https://www.tensorflow.org/lite/guide/python
Acquire necessary libraries to build the TFlite runtime
pip3 install cython
pip3 install numpy
apt-get install python3-pil
Install TFlite runtime
pip3 install tflite_runtime-2.1.0.post1-cp36-cp36m-linux_aarch64.whl
Download Classification example, test an inference operation
Create a place for the Coral examples to reside.
mkdir coral && cd coral
Clone the examples, "cd" to examples directory.
git clone https://github.com/google-coral/tflite.git
cd tflite/python/examples/classification
Install prerequisite programs using supplied script.
bash install_requirements.sh
Run the classifcation demo.
python3 classify_image.py \
--model models/mobilenet_v2_1.0_224_inat_bird_quant_edgetpu.tflite \
--labels models/inat_bird_labels.txt \
--input images/parrot.jpg
Gstreamer example
This example will use a USB webcam and the TPU to identify objects presented to the webcam. The video output and overlay will be streamed to a location on the network for viewing.
Install Gstreamer, you will need this program on both the SBC and your workstation where you will be viewing the output.
apt-get install gstreamer1.0-x gstreamer1.0-tools gstreamer1.0-plugins-good gstreamer1.0-plugins-bad gstreamer1.0-alsa -y
Clone the Gstreamer example
mkdir google-coral && cd google-coral
git clone https://github.com/google-coral/examples-camera.git --depth 1
Download models. Models are the information that will be feed to the TPU for it to reference when identifying an object.
cd examples-camera
sh download_models.sh
Configure the Gstreamer Python script
cd gstreamer
bash install_requirements.sh
Adaptations to the existing gstreamer.py will be required for this example to work. A modified script is available to download from here. Edit this file line 231 with the IP address of the desktop workstation you will be streaming to. This is what the edited line will look like.
! rsvgoverlay name=overlay ! videoconvert ! jpegenc ! tcpclientsink host=172.24.24.93 port=9001
- The workstation being used in this example has an IP address of 172.24.24.93, the SBC is using an IP which is on the same subnet.
Launch Gstreamer on your workstation.
gst-launch-1.0 tcpserversrc host=0.0.0.0 port=9001 ! jpegdec ! videoconvert ! autovideosink sync=false
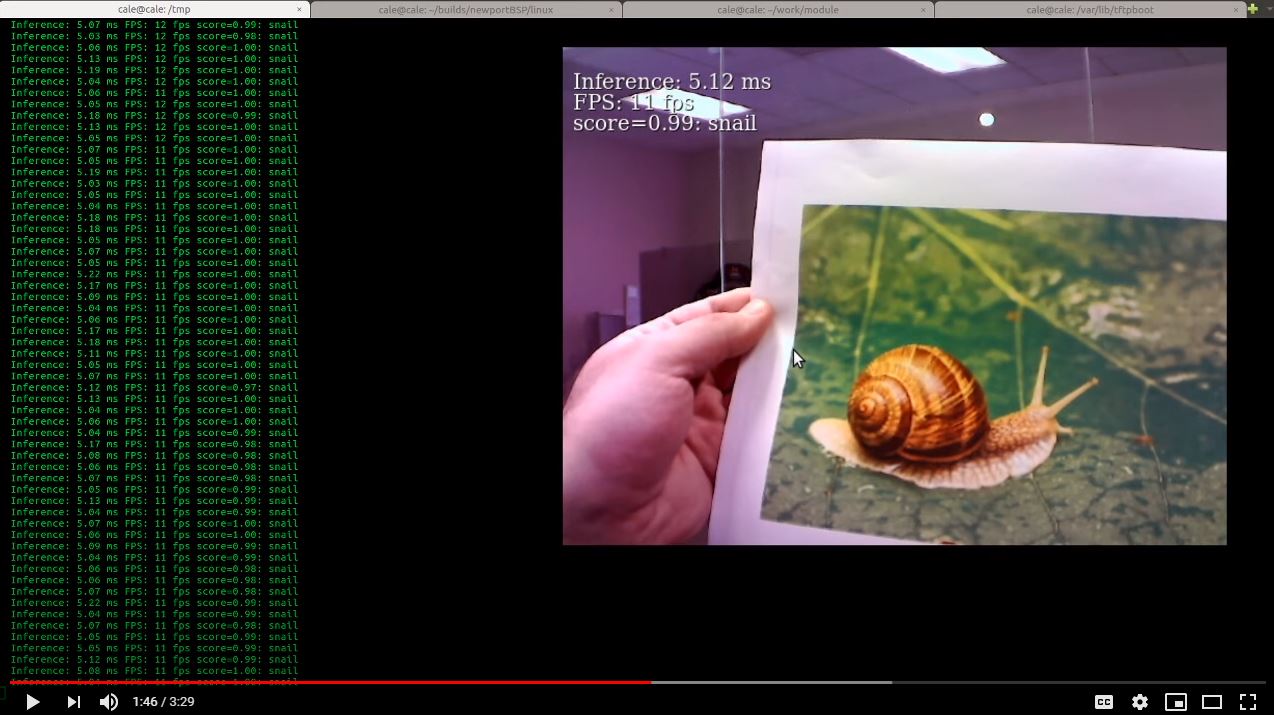
On the Gateworks SBC run:
python3 classify.py
Here's a video demonstration of the output you can expect if everything is working:
Video: https://youtu.be/pss6Gy_8UI4

Going Further
Some additional links for models and creating your own models:
Attachments (8)
-
gstreamer.py
(9.6 KB
) - added by 4 years ago.
gstreamer.py
-
AI.jpg
(1.8 MB
) - added by 4 years ago.
AI Graphic
-
GW6903_wTPU.JPG
(841.5 KB
) - added by 4 years ago.
GW6903 Board with Google Coral TPU
-
Youtubecoral.JPG
(147.1 KB
) - added by 4 years ago.
Youtube screen
- 6903_small_top.jpg (52.2 KB ) - added by 4 years ago.
- GW6903_wTPUcut.jpg (1000.3 KB ) - added by 4 years ago.
- GW6903_AngledView.png (501.8 KB ) - added by 4 years ago.
- GW6903_wTPUcutsmall.jpg (154.7 KB ) - added by 4 years ago.
Download all attachments as: .zip