
| Version 8 (modified by , 2 years ago) ( diff ) |
|---|
Node-RED
Node-RED is software ran on Node.js that allows for flow-based visual programming in a browser, to wire together hardware, inputs, and services for Internet of Things (IoT) applications.
Node-RED can be used with the Gateworks SBCs.
Typically, Node-RED may actually run on a server machine and the Gateworks SBC acts as a client and talks back to the server. Or, Node-RED can be install on the Gateworks SBC itself.
This wiki page assumes the usage of a Gateworks Venice SBC with the latest kernel (5.10 or newer)
Install Node-RED on Gateworks SBC
Installing Node-Red on a Gateworks SBC isn't any different than many other Linux platforms, which instructions are detailed on the internet.
Doing the below commands will make the Gateworks SBC act as the 'server'
    sudo apt-get update
    sudo apt-get install mosquitto #if wanting to use the MQTT protocol to talk to client
    sudo apt-get install nodejs #beware Ubuntu default may be 10.19, and it would be better to use a newer version
    sudo apt-get install npm #get the node package manager
    sudo npm install -g --unsafe-perm node-red #install node-red using npm
    node-red #start the node-red application

Welcome to Node-RED
===================

17 Dec 23:23:34 - [info] Node-RED version: v2.1.4
17 Dec 23:23:34 - [info] Node.js  version: v10.19.0
17 Dec 23:23:34 - [info] Linux 5.15.0-00085-g2ec7c180b810 arm64 LE
17 Dec 23:23:37 - [info] Loading palette nodes
17 Dec 23:23:40 - [info] Settings file  : /root/.node-red/settings.js
17 Dec 23:23:40 - [info] Context store  : 'default' [module=memory]
17 Dec 23:23:40 - [info] User directory : /root/.node-red
17 Dec 23:23:40 - [warn] Projects disabled : editorTheme.projects.enabled=false
17 Dec 23:23:40 - [info] Flows file     : /root/.node-red/flows.json
17 Dec 23:23:40 - [warn]

---------------------------------------------------------------------
Your flow credentials file is encrypted using a system-generated key.

If the system-generated key is lost for any reason, your credentials
file will not be recoverable, you will have to delete it and re-enter
your credentials.

You should set your own key using the 'credentialSecret' option in
your settings file. Node-RED will then re-encrypt your credentials
file using your chosen key the next time you deploy a change.
---------------------------------------------------------------------

17 Dec 23:23:40 - [info] Server now running at http://127.0.0.1:1880/
17 Dec 23:23:40 - [info] Starting flows
17 Dec 23:23:41 - [info] Started flows
17 Dec 23:23:41 - [info] [mqtt-broker:c44d6461e1d6d8c3] Connected to broker: mqtt://localhost:1883
Once node-red is running, use a browser to open the node-red gui on port 1880.
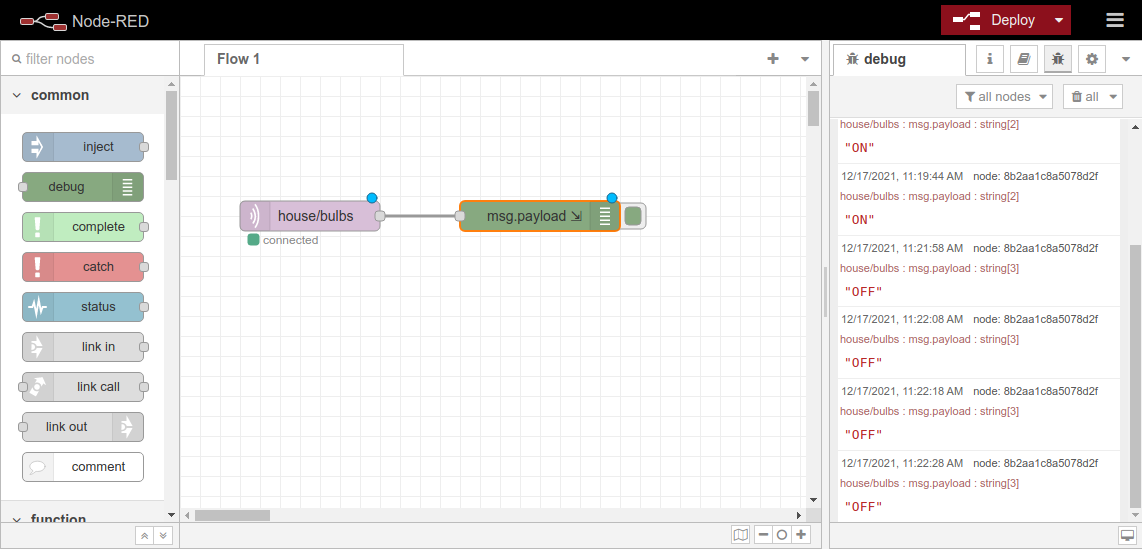
- Demo Setup:
- This demo takes an incoming MQTT message from a client and just prints it out in the debug screen.
- Use the MQTT input module connected to a debug module ti replicate what is shown in the picture below.

Create a Client on Gateworks SBC
    sudo apt-get update
    sudo apt-get install python #if wanting to use the MQTT protocol to talk to client
    sudo apt-get install nodejs #beware Ubuntu default may be 10.19, and it would be better to use a newer version
Then, create a python script (example below) to send MQTT messages from the client SBC to the server SBC.
Gateworks Python Script to send MQTT Messages
The below is a sample python script to pass MQTT messages from the Gateworks SBC to the Node-Red server (broker). The script will pass the Gateworks SBC temperature as the payload and send it specific to the device's serial number.
Running the script on the client:
root@focal-venice:~# python gateworks.py
852420
Connected with result code {'session present': 0}
in loop
done publishing
('message received ', '50.4')
('message topic=', u'gateways/id/852420')
('message qos=', 0)
('message retain flag=', 0)
in loop
done publishing
('message received ', '50.5')
('message topic=', u'gateways/id/852420')
('message qos=', 0)
('message retain flag=', 0)
Script source code:
# Compatible with python 2.* version
import sys
import os.path
import json
import time
import random
import paho.mqtt.client as mqtt
from datetime import datetime

def on_message(client, userdata, message):
 print("message received " ,str(message.payload.decode("utf-8")))
 print("message topic=",message.topic)
 print("message qos=",message.qos)
 print("message retain flag=",message.retain)

def on_connect(client, userdata, rc,a):
 print("Connected with result code "+str(rc))
 # Subscribing in on_connect() means that if we lose the connection and
 # reconnect then subscriptions will be renewed.
 client.subscribe("gateways/id/#")

def main(argv):
 client = mqtt.Client("clientone")
 client.on_connect = on_connect
 client.on_message = on_message
 broker = "122.24.33.93"
 client.connect(broker)
 client.loop_start()
 serialnumber = str(open('/proc/device-tree/serial-number', 'r').read())
 print(serialnumber)
 prefix = "gateways/id/"
 time.sleep(1)
 while True:
    try:
        print("in loop")
	temp = float(open('/sys/class/hwmon/hwmon0/temp1_input', 'r').read().strip())/1000
        prefix = "gateways/id/"
        serialnumber = str(open('/proc/device-tree/serial-number', 'r').read().strip('\x00'))
        topic = prefix + serialnumber
        client.publish(topic,temp,1)
        print("done publishing")

    except Exception as ex:
        print(ex.message)
        sys.exit(0)
    time.sleep(5)


if __name__ == "__main__":
    main(sys.argv)
Links & Resources
Attachments (2)
- nodered.png (73.7 KB ) - added by 2 years ago.
- nodered2.png (49.2 KB ) - added by 2 years ago.
Download all attachments as: .zip