
JTAG USB User's Guide
The Gateworks GW16099 JTAG Adapter is used for flashing firmware to Gateworks Boards as well as serial console access.
This device is used to access Gateworks devices for debugging and developing purposes.
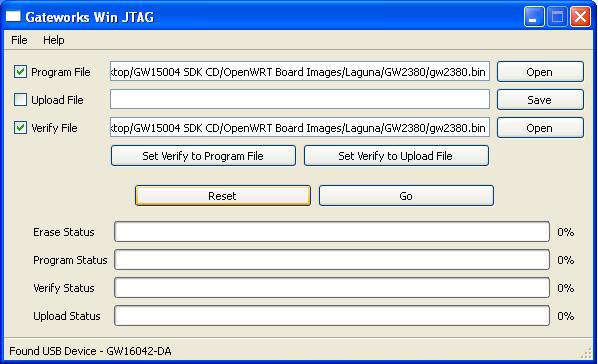
Gateworks provides a software utility application supporting x86 Linux. While JTAG programming is not supported for Windows operating systems you can use the JTAG dongle as a serial console.

References:
JTAG Executables
The latest Gateworks JTAG Utilities are found here
Physical Connections
The JTAG header (10 pins) on a Gateworks single board computer (SBC) can be identified by looking at the connectors finding word JTAG silkscreened nearby on the PCB. Connect the Type-A USB port to a laptop or desktop PC. Connect the 10-pin ribbon cable to the Gateworks single board computer.
All devices (laptop, desktop, SBC, peripherals, etc need to use a 3-pin power plug with ground pin to avoid ground loops.
Stand alone programmer:
Instructions
Videos:
- jtag_usbv4, flashing .bin file, flashing GSC firmware, using mkimage_jtag to create .bin
- Getting started with Screen and flashing with TFTP
Software compatibility:
The Gateworks jtag_usb utility supports x86 32bit and 64bit Linux systems. Ubuntu is recommended, however most x86 Linux distros should work.
Virtual Machines should not be used due to potential timing issues which will cause the flash to fail.
The most recent version jtag_usbv4 supports all Gateworks product families and can be downloaded here
Connecting the programmer
The Gateworks JTAG dongle uses a FTDI FT2232C Dual USB-UART/FIFO chip and when enumerated on the USB bus on a desktop or laptop will show as:
lsusb | grep 0403:6010
Bus 001 Device 007: ID 0403:6010 Future Technology Devices International, Ltd FT2232C Dual USB-UART/FIFO IC
When connected the module ftdi-sio will expose two USB serial devices on the desktop/laptop, this can be verified using dmesg -w or tail -f /var/log/syslog when the programmer is connected to the workstation.
ls -l /dev/ttyUSB*
crw-rw---- 1 root dialout 188, 0 Apr  2 07:04 /dev/ttyUSB0
crw-rw---- 1 root dialout 188, 1 Apr  2 07:04 /dev/ttyUSB1
The first serial device (/dev/ttyUSB0) is used for JTAG, the second device (/dev/ttyUSB1) is for the serial console UART. You must remove the ftdi_sio module in order to use the jtag_usbv4 application.
The jtag_usb works by loading a small application onto the target processor which runs out of the SDRAM. Therefore you may need to update to the latest version in order to have support for new boards or memory configurations.
- Latest Linux x86 jtag_usb (jtag_usbv4) download: http://dev.gateworks.com/jtag/
Conflict with ftdi-sio driver
The jtag_usb application requires that the Linux ftdi_sio kernel module not be loaded to run. You can temporarily unload it, then reload it (ie by hotplugging the jtag dongle) when done if you require it.
To remove the module (prior to programming):
sudo rmmod ftdi_sio
You can determine if the ftdi_sio module is loaded using lsmod:
lsmod | grep ftdi
ftdi_sio               39858  1
usbserial              42355  3 ftdi_sio
- Here the ftdi_sio IS loaded, it must be removed to program.
If you want to re-load the ftdi_sio module you can unplug and reconnect the Gateworks JTAG-USB Programmer on the USB bus (which triggers a hotplug event and reloads the module), or manually load it with sudo modprobe ftdi_sio.
Linux permissions on USB device
Serial devices are part of the 'dialout' group therefore require root permissions. The following errors can be resolved by issuing the jtag_usbv4 command as 'root'.
$ jtag_usbv4
libusb couldn't open USB device /dev/bus/usb/001/005: Permission denied.
libusb requires write access to USB device nodes.
libusb couldn't open USB device /dev/bus/usb/001/005: Permission denied.
libusb requires write access to USB device nodes.
$ ls -l /dev/bus/usb/001/005
crw-rw-r-- 1 root root 189, 4 Apr  2 06:54 /dev/bus/usb/001/005
Advanced users may wish to create rule to change the device permissions every time it's enumerated on the bus. This can be done by adding a udev rule which identifies the VendorID and ProductID of the Gateworks JTAG-USB Programmer and executes a chmod on it:
cat << EOF > 51-gateworks-jtag-ftdi.rules
# GW16060 Dongle
SUBSYSTEM=="usb",ATTR{idVendor}=="0403",ATTR{idProduct}=="6010",MODE="0666",GROUP="users"
# GW16061 Gang adapter
SUBSYSTEM=="usb",ATTR{idVendor}=="0403",ATTR{idProduct}=="6011",MODE="0666",GROUP="users"
EOF
sudo mv 51-gateworks-jtag-ftdi.rules /etc/udev/rules.d
sudo chmod 655 /etc/udev/rules.d/51-gateworks-jtag-ftdi.rules
# cause rules to be re-read and processed (or reboot)
sudo udevadm control --reload-rules
sudo service udev restart
sudo udevadm trigger
Using jtag_usb to read/write Firmware, Program Software
Download the jtag_usbv4 Linux software here: http://dev.gateworks.com/jtag/
Note that an update may be required for new board models or memory configurations.
Important Note: It is not supported or recommended to 'hot swap' the JTAG ribbon cable or USB device from a desktop/laptop while the Gateworks SBC is powered on. All connections should be made before powering on the Gateworks SBC.
- With the SBC powered off, connect the JTAG-USB Programmer to the JTAG header on a Gateworks Single Board Computer (SBC) using the attached ribbon cable.
- Connect the JTAG-USB Programmer to a PC USB port using the supplied USB cable.
- If using a SBC with a i.MX8M Plus CPU (Venice GW7xxx-2x or GW74xx), attach a USB cable from the USB port on the SBC to the the desktop/laptop host PC.
- Verify FTDI module is not loaded.
sudo rmmod ftdi_sio
- Apply power to the Gateworks board.
- All Venice boards using the i.MX8M Plus processor need a USB cable plugged in between the SBC and the host system. This is in addition the the GW16099 JTAG Dongle
- Run the JTAG program (jtag_usbv4) with the syntax shown below to program a .bin file to the boards flash:
./jtag_usbv4 –p <filename>
- Optionally you can append 2>/dev/null to redirect error
- Only flash .bin files using the jtag software. (or a .txt file for programming)
- The switches –u <filename> –v <filename> are also available but are unnecessary to use when programming flash.
- If you encounter any errors see the Troubleshooting section below.
jtag_usbv4 options:
| Option | Operation | Notes |
|---|---|---|
| -p | Program Flash device using specified filename | |
| -v | Verify Flash device using specified filename | |
| -u | Upload Flash device using specified filename | Ventana & Newport not supported |
| -m | Program GSC Firmware using specified filename | |
| -x | Verify GSC Firmware using specified filename |
Examples
Programming a firmware image:
./jtag_usbv4 -p venice-imx8mm_u-boot_spl.bin


Gateworks JTAG Programmer v4.0 r327
Copyright (C) 2004-2014, Gateworks Corporation, All Rights Reserved
Built 08:28:20, Oct 29 2014
Using USB Port

Channel #      S01
--------------------------------------------------------------------------------
USB Open Rev    r0
JTAG_ID #00    CSD
JTAG_ID #01    MSP
Load Debugger   OK
Flash Size     58G
Flash Test      OK
Flash Chk[0]   INC
Flash Prg[0]    OK
Flash Vfy[0]    OK
Troubleshooting
- If using a SBC with a i.MX8M Plus CPU (Venice GW7xxx-2x or GW74xx), additionally attach a USB cable from the USB port on the SBC to the the desktop/laptop host PC.
- Permission denied: libusb couldn't open USB device - see above regarding Linux permissions
- fOP: USB Open Rev fOP - failure to open the USB device via libusb - you likely have the ftdi_sio serial driver loaded - see above
- FAL: JTAG_ID_#00 FAL - failure to identify a supported JTAG TAP on the target device - likely you have not powered the target board
- If the error message is fDR, this is failing DRAM. There could be a hardware issue. Be sure you are using the latest jtag_usbv4 tool from the Gateworks website.
- If while programming a board it gets stuck an invalid image may have locked up the board or the board is not powered on. Please try powering on the board.
- Flashing a invalid image. There are times when downloading files that the html version was downloaded rather than the file itself. Check the file extension and file size to be sure you have the correct file.
- While programming, if it gets stuck at "Load Debugger: fS3' or fS2, this may mean there are issues with the GSC. Please re-flash the GSC firmware as demonstrated here: http://trac.gateworks.com/wiki/gsc#GSCUpdates
- Be sure to always use the latest version of
jtag_usbv4, failure to do so can result in the inability to flash. - It is not supported or recommended to 'hot swap' the JTAG ribbon cable or USB device from a desktop/laptop while the Gateworks SBC is powered on. All connections should be made before powering on the Gateworks SBC.
Creating jtagable binary images with mkimage_jtag
In order to create a jtagable image for Newport and Ventana products, you need to use the mkimage_jtag script to create a binary file containing flash instructions and content used by the jtag_usbv4 application. You can download the latest version of the script here:
wget http://dev.gateworks.com/jtag/mkimage_jtag
chmod +x mkimage_jtag
The usage varies, depending on what you want to program, how, and where. For example, you can create images that only update the boot firmware without touching the rest of flash. In general you provide binary files and details on where to place them and what to erase.
Notes:
- Because JTAG is extremely slow for large flash parts such as eMMC it is advised that you use JTAG just to flash the boot firmware then use the boot firmware to flash the remainder of the device
- the
-soption invokes the 'scripted' mode which allows you to specify multiple objects - for eMMC:
- you must use the
-sscripted mode and the-eflag to erase the entire part does nothing special as the erase mode is specified for each blob - you can specify the '--partconf <boot0|boot1|user>' option to instruct
jtag_usbv4to configure the eMMC to boot off the boot0, boot1, or user hardware partition - each blob must match the format <blob-file>@<hardware-partition>:<erase_mode>:<start-block>-[end-block] where:
- hardware-partition specifies the eMMC hardware partition: boot0, boot1, or user
- erase-mode specifies what type of erase mode to use:
- erase_none - no erase
- erase_all - erase the entire hardware partition from block 0 to end of device
- erase_part - erase only part of the hardware partition specified by <start-block> and <end-block>
- if end block is not specified it will default to the last block of the hardware partition
- you must use the
- for NAND:
- you do not need to use the
-sscripted mode and can instead use the following legacy syntax:- mkimage_jtag <ubi> > firmware.bin # program ubi@17MB and erasing to the end of the device
- mkimage_jtag <spl> <uboot> > firmware.bin # program the SPL and U-Boot only erasing 0 to 16MB (thus leaving U-Boot env and ubi in-tact)
- mkimage_jtag <spl> <uboot> <ubi> > firmware.bin # erase entire part and program the SPL, U-Boot, and UBI
- if you wish to erase the entire NAND part use the
-eflag which also specifies scripted mode
- you do not need to use the
Examples:
- eMMC:
- create a firmware image appropriate for an IMX8MM based Venice board with the latest OpenWrt pre-built image on the eMMC user hardware partition and latest boot firmware on the eMMC boot0 hardware partition:
# get mkimage_jtag and make it executable
wget https://dev.gateworks.com/jtag/mkimage_jtag
chmod +x mkimage_jtag
# get latest prebuilt boot firmware image
wget https://dev.gateworks.com/venice/images/firmware-venice-imx8mm.img
# get latest prebuilt openwrt compressed disk image and uncompress it
wget https://dev.gateworks.com/venice/images/openwrt-venice.img.gz
gunzip openwrt-venice.img
# create an image for imx8mm with boot firmware on emmc boot0 and compressed disk image on emmc user
mkimage_jtag --soc imx8mm --emmc -s --partconf=boot0 \
   firmware-venice-imx8mm.img@boot0:erase_part:0-8192 \
   openwrt-venice.img@user:erase_part:0- \
   > openwrt-venice-imx8mm.bin
- configure the eMMC to boot from the user hardware partition, program the boot firmware to the user hardware partition but only erase from block 0 to block 32768 (0 to 16MiB):
./mkimage_jtag --emmc -s --partconf=user firmware.img@user:erase_part:0-32768 > firmware.bin - configure the eMMC to boot from the user hardware partition, program the boot firmware to the user hardware partition and erase the entire user hardware partition:
./mkimage_jtag --emmc -s --partconf=user firmware.img@user:erase_all:0-32768 > firmware.bin
- create a firmware image appropriate for an IMX8MM based Venice board with the latest OpenWrt pre-built image on the eMMC user hardware partition and latest boot firmware on the eMMC boot0 hardware partition:
- Ventana NAND: (see wiki:ventana/bootloader#nand here for NAND flash map)
- update just the boot firmware (SPL and u-boot) - Does not erase anything else:
./mkimage_jtag SPL u-boot.img > uboot.bin
- program a UBI image erasing to the end of the device (does not touch boot firmware):
./mkimage_jtag openwrt-ventana-rootfs.ubi > image.bin
- program boot firmware and a UBI (erases entire flash):
./mkimage_jtag SPL u-boot.img openwrt-ventana-rootfs.ubi > image.bin
- program U-boot SPL, env, and erase entire part using scripted mode
mkimage_jtag -e SPL@0 u-boot.img@14M env@16M > image.bin
- update just the boot firmware (SPL and u-boot) - Does not erase anything else:
Once these steps are complete and the bin file has been generated, follow the other instructions on this page to flash this .bin file to the board. Linux instructions for programming are here #linux-jtag-flashing
Troubleshooting:
- If downloaded from a browser, make sure the
mkimage_jtagscript does not have any file extensions such as txt and be sure is has executable permissions.
Serial Console Access on Linux
Establishing a serial console in Linux instructional video
The JTAG connector on all Gateworks Families includes a serial port.
You may use the device with your favorite linux terminal program (Screen, etc...) at 115,200 baud, 8 data bits, 1 stop bit, no parity and no flow control
Gateworks suggests using the program screen to access the serial console.
Example: open /dev/ttyUSB1 (Note that the device may vary on your system if you had /dev/ttyUSB devices prior to plugging the JTAG adapter into your USB bus)
screen /dev/ttyUSB1 115200,cs8
- You may need to use the sudo command in front of the screen command
- Typically /dev/tty* nodes are owned by root.dialout which means you need to be root or a member of the dialout group. If this is the case you will get a permissions error and you can either run the command with a 'sudo' in front of it, or add your user to the dialout group
Now that access to the console has been established you may wish to flash your firmware using TFTP. This method is much faster than using Jtag. Instructions are specific to board family:
- Ventana linux/ubi
- Newport newport/firmware
- Venice venice/firmware
Troubleshooting:
- you will likely need to add your user to the dialog group by editing the /etc/group file:
ls -l /dev/ttyUSB*
- make sure modem-manager is not installed as this will perform serial operations on new tty devices when they appear on the system and likely cause issues with using screen on the same port:
sudo apt-get remove --purge modem-manager
Windows
Programming
Gateworks does not offer JTAG programming software for Windows If you're limited to using a system which has Windows naively installed consider creating a 'live boot' (with persistance) USB with Ubuntu.
Windows Operating Instructions For Serial
You can use a terminal program for windows such as Putty / Hyperterminal to connect to the Gateworks board serially over the JTAG / or serial port as long as the FTDI Virtual COM port drivers are installed on your system:
- https://www.ftdichip.com/Drivers/VCP.htm - Downloads for x86 (32bit) and x64 (64bit) Windows drivers
To see if you have the proper drivers installed simply connect the Gateworks JTAG dongle to your Windows PC and look in the 'Device Manager' application under 'COM Ports' to see if a new serial device was added.

Configure the terminal program for 115,200 baud, 8 data bits, 1 stop bit, no parity and no flow control.
Power the board, and wait for text to output. Hitting the 'Enter' key may also bring up a prompt.
There are many guides that can be found on Google about using the program 'PUTTY' for serial console access.
General Troubleshooting
- All devices (laptop, desktop, SBC, peripherals, etc need to use a 3-pin power plug with ground pin.
- Do not use a Virtual Machine
- USB hubs may lead to inconsistent serial data. Create a direct USB connection.
- If while programming a board it gets stuck an invalid image may have locked up the board or the board is not powered on. Please try powering on the board.
- Flashing a invalid image. There are times when downloading files that the html version was downloaded rather than the file itself. Check the file extension and file size to be sure you have the correct file.
- While programming, if it gets stuck at "Load Debugger: fS3' or fS2, this may mean there are issues with the GSC. Please re-flash the GSC firmware as demonstrated here: http://trac.gateworks.com/wiki/gsc#GSCUpdates
- Ground loops can occur between the board power supply and the JTAG cable. Be aware of this and isolate properly.
- GW16042 with 10 > 14 pin adapter board will flail to flash Newport boards. Serial console is verified to work.
If still have difficulties, please contact Gateworks support at support@gateworks.com
Secure JTAG
If you are enabling Secure JTAG on your i.mx8mm boards (via setting SJC_LOCK via 'fuse prog -y 0 0 0x400') upon JTAG programming you will see something like:
Channel #      S01
--------------------------------------------------------------------------------
USB Open Rev    r0
JTAG_ID #00    CSD
JTAG_ID #01    MSP
Device Locked  00%
Challenge: 0x1B2A9209DAB4B890, Response:
At this point you would enter the 56bit hex response (with or without leading 0x).
The 64bit challenge key is a board-specific unique key (meant for you to store in a secure database associated with the 56bit response key). The 56bit response key is programmed into 0x600[0:31] and 0x610[0:23] (via 'fuse prog -y 8 0 <lowerbits>' and 'fuse prog -y 8 1 <upperbits>).
You can also enter the response via a command-line argument '-c <56bithex>'.
There isn't anything special you have to have installed other than a version of jtag_usbv4 later than Sep 27. Our latest version of jtag_usbv4 (v5.0-g34e7cc5) can be found at https://dev.gateworks.com/jtag/jtag_usbv4.
JTAG Programmer Hardware
Please see out JTAG hardware page here: JTAG Hardware PAGE
Attachments (8)
- VentanaJTAG.jpg (204.1 KB ) - added by 9 years ago.
- gw16042.JPG (6.5 KB ) - added by 9 years ago.
- winjtag.JPG (21.5 KB ) - added by 9 years ago.
- winjtag2.JPG (27.6 KB ) - added by 9 years ago.
- winjtag3.JPG (28.3 KB ) - added by 9 years ago.
- winjtag4.JPG (45.5 KB ) - added by 9 years ago.
-
u-boot.img
(552.7 KB
) - added by 8 years ago.
u-boot
- devicemanager2.jpg (65.9 KB ) - added by 15 months ago.
Download all attachments as: .zip