
Venice Multimedia Connectivity
The GW720x, GW730x, and GW740x boards have a 50-pin MIPI Media Connector to support displays (LCD) and cameras. While this page is related to the software side of the MIPI connector, all hardware (pinouts, diagrams, etc) are on the venice/mipi page.
* Note: GW72xx and GW73xx mated with a GW702x i.MX8M Plus SOM does not support MIPI CSI / DSI.
Kernel Support
Support for IMX8MM MIPI CSI capture, MIPI DSI display, and VPU VP8/H264 decode are added to the downstream 5.15-venice Gateworks kernel via patches.
While IMX8MM MIPI CSI support will be in the mainline v5.17 kernel, the MIPI DSI support in mainline is still being worked on. While there is support for the IMX8MM VPU decode making its way upstream there is no support currently for the IMX8MM VPU encoder.
For more info on IMX8MM kernel support see venice#linux
Venice GPU Support
The GPU uses driver CONFIG_DRM_ETNAVIV which must be enabled in the kernel to work in Linux.
To verify if the GPU is enabled on a booting board, utilize the example below showing that the GPU is enabled via the etnaviv driver:
root@noble-venice:~# dmesg | grep etna
[    7.879805] etnaviv etnaviv: bound 38000000.gpu (ops gpu_ops [etnaviv])
[    7.884832] etnaviv etnaviv: bound 38008000.gpu (ops gpu_ops [etnaviv])
[    7.887211] etnaviv etnaviv: bound 38500000.npu (ops gpu_ops [etnaviv])
[    7.887354] etnaviv-gpu 38000000.gpu: model: GC7000, revision: 6204
[    7.887502] etnaviv-gpu 38008000.gpu: model: GC520, revision: 5341
[    7.889991] etnaviv-gpu 38500000.npu: model: GC8000, revision: 8002
[    7.890017] etnaviv-gpu 38500000.npu: etnaviv has been instantiated on a NPU, for which the UAPI is still experimental
[    7.890611] [drm] Initialized etnaviv 1.4.0 for etnaviv on minor 0
root@noble-venice:~# zcat /proc/config.gz | grep ETNA
CONFIG_DRM_ETNAVIV=m
CONFIG_DRM_ETNAVIV_THERMAL=y
root@noble-venice:~#
Venice Video Display
The IMX8M Mini SoC supports the following video display hardware capabilities:
- LCDIF Display controller supporting up to 1920x1200p60 via 4-lane MIPI DSI (operating up to a max bit rate of 1.5 Gbps)
- 3D GPU Core supporting:
- OpenGL ES 1.1, 2.0
- OpenVG 1.1
- TrustZone support using a local MMU to manage secure regions
- 2D GPU Core supporting:
- multi-source composition
- one-pass filter
Compatible Display Devices
Display Devices:
- DFROBOT DFR0678 7" 800x480 TFT Raspberry Pi DSI Touchscreen
- DFROBOT DFR0550 5" 800x480 TFT Raspberry Pi DSI Touchscreen
Both of these displays consist of almost identical hardware:
- STM32F103C8T6-LQFP48 Microncontroller for backlight providing a backlight enable GPIO (on/off) - there is a physical thumbwheel to adjust brightness
- FT5316 I2C touchscreen controller without IRQ (requires a driver patch to allow 'polling' the controller); however the FT5x06 I2C runs 'through' the MCU which polls it and presents some different I2C API on the 15pin PFC I2C
- 800x480 WVGA TFT LCD panel
- ICN6211 MIPI-DSI bridge (MIPI DSI to MIPI DBI up to WXGA resolution); appears to be TC358762 compatible after the MCU configures it via I2C on power-up
The Linux drivers for these displays are:
- regulator:
- CONFIG_REGULATOR_RASPBERRYPI_TOUCHSCREEN_ATTINY=y drivers/regulator/rpi-panel-attiny-regulator.c rpi_panel_attiny_regulator.ko
- touchscreen:
- CONFIG_TOUCHSCREEN_EDT_FT5X06 edt-ft5x06.ko
- MIPI DSI / DRM:
- CONFIG_DRM drm.ko
- CONFIG_DRM_PANEL_SIMPLE drivers/gpu/drm/panel/panel-simple.c panel_simple.ko
- CONFIG_DRM_TOSHIBA_TC358762 drivers/gpu/drm/bridge/tc358762.c tc358762.ko
- CONFIG_DRM_MXSFB=y drivers/gpu/drm/mxsfb/ mxsfb.ko
- CONFIG_LOGO=y (optional; if you want the tux)
- CONFIG_DRM_SAMSUNG_DSIM=y drivers/gpu/drm/bridge/samsung-dsim.c samsung-dsim.ko (changes required that are not yet in mainline)
- CONFIG_DRM_SAMSUNG_DSIM_IMX=y drivers/gpu/drm/bridge/samsung-dsim-imx.c samsung-dsim-imx.ko (not yet in mainline)
- CONFIG_PHY_EXYNOS_MIPI_VIDEO=y drivers/phy/samsung/phy-exynos-mipi-video.c phy_exynos_mipi_video.ko (not yet in mainline)
Device-Tree changes:
- to add a device to your system you must properly configure your device-tree to describe how the device is connected to the host processor and other peripherals. Often this is most easily done via a device-tree overlay. The Gateworks venice kernels have dt overlays that support the DFROBOT 5in and 7in displays on the GW720x and GW730x boards. The dt overlay can be applied to the dt prior to booting the kernel by U-Boot. Examples:
- GW74xx display:
setenv fdt_overlays imx8mp-venice-gw74xx-rpidsi.dtbo
saveenv
- GW730x display:
setenv fdt_overlays imx8mm-venice-gw73xx-0x-rpidsi.dtbo
saveenv
- GW720x display:
setenv fdt_overlays imx8mm-venice-gw72xx-0x-rpidsi.dtbo
saveenv
- GW74xx display:
The Linux runtime devices:
- /sys/class/backlight/7inch-touchscreen-panel-bl/ - back-light controller
- /sys/class/regulator/regulator.9/ - tc358762-power
- /sys/class/input/input1/ /dev/input/event1 - generic ft5x06 (79)
- /sys/class/drm/card0
- /sys/class/drm/card0-DPI-1
- /sys/class/graphics/fb0 - mxsfb_drv.c
Notes:
- no kernel cmdline needed for video out
Software to Add a New Display
Please note, a display of any kind needs a software driver for the chip used on the display as well as a software driver for the IMX MIPI-DSI controller. These drivers are not trivial and if a chip is on the display that doesn't have an existing driver for it, one will need datasheets and reference manuals to write the driver - this is not an easy lift and would require strong software expertise.
Please note this software effort has basically already been completed for our pre-approved and tested displays.
Note for use of other displays there are several MIPI DSI bridge chips with Linux drivers listed in: https://elixir.bootlin.com/linux/latest/source/drivers/gpu/drm/bridge/Kconfig
Note that it is difficult to obtain software documentation for these chips, including the ones there so it would be wise to only try using something with a MIPI-DSI bridge chip that is already supported.
See the 'Compatible Display Devices' section for an example of what it takes for a display.
Example DSI overlay: https://github.com/Gateworks/linux-venice/blob/v5.15.15-venice/arch/arm64/boot/dts/freescale/imx8mm-venice-gw73xx-0x-rpidsi.dts
Hardware Accelerated Qt5
see qt
Hardware Accelerated Desktop UI
While it is not typical to use an embedded system with a desktop UI we often are asked how to do it.
With the Ubuntu Focal (20.04) all the software is in place to give you 2D and 3D hardware acceleration on the IMX8MM with a modern kernel such as the Linux 5.15-venice kernel.
Here are the steps to add a desktop UI:
- Add a USB mouse and keyboard to your hardware configuration
- Add a compatible display to your hardware configuration
- add a non-root user (required to login)
adduser gateworks
- add packages
apt update
apt install gnome-session gnome-terminal # installs about 1.5GB of packages
reboot # sync filesystem and reboot
- you'll notice dragging opaque windows around is fairly smooth as it is using hardware 2D acceleration
- Network manager will not allow access to interfaces in the GUI with "ifupdown" installed. If you plan to use network functions within the GUI you will need to remove/purge this package first. All network settings must be configured using the terminal.
- 3D opengl hardware acceleration:
apt install mesa-utils glmark2
glxgears
glmark2
- Note you need to run glxgears from a terminal on the display
- glxgears shows ~160 fps on IMX8MM
- glmark2 score is 39 on IMX8MM
- GStreamer Video display
apt install gstreamer1.0-x gstreamer1.0-tools \
gstreamer1.0-plugins-base gstreamer1.0-plugins-good gstreamer1.0-plugins-bad gstreamer1.0-plugins-ugly \
gstreamer1.0-libav gstreamer1.0-gl gstreamer1.0-gtk3 gstreamer1.0-qt5 v4l-utils
# use fbdevsink if not running a desktop GUI
gst-launch-1.0 videotestsrc ! fbdevsink
# use kmssink for zero-copy DRM/KMS (need to provide caps)
gst-launch-1.0 videotestsrc ! video/x-raw,width=800,height=480,format=BGRx ! kmssink driver-name="mxsfb-drm" force-modesetting=true
# use glimagesink if running in a terminal within a desktop GUI
gst-launch-1.0 videotestsrc ! glimagesink
Other possible displays
Another display that Gateworks has not tested is the following from NXP:
- NXP RK055HDMIPI4MA0
- URL: URL
Venice Video Capture
The IMX8M Mini SoC supports a 4-lane MIPI CSI2 (MIPI Camera Serial Interface) which operates up to a maximum bit rate of 1.5 Gbps with features including:
- Configurable interface logic to support most commonly available CMOS sensors.
- Support for ITU-R BT.656 video interface as well as traditional sensor interface.
- 8-bit / 16-bit / 24-bit data port for YCbCr, YUV, or RGB data input.
- 8-bit / 10-bit / 16-bit data port for Bayer data input.
- Full control of 8-bit/pixel, 10-bit/pixel or 16-bit / pixel data format to 64-bit receive FIFO packing.
- 256 x 64 FIFO to store received image pixel data.
- Receive FIFO overrun protection mechanism.
- Embedded DMA controllers to transfer data from receive FIFO or statistic FIFO through AHB bus.
- Support 2D (data is chosen as x/y coordinate) DMA transfer from the receive FIFO to the frame buffers in the external memory.
- Support double buffering two frames in the external memory.
- Single interrupt source to interrupt controller from maskable interrupt sources: Start of Frame, End of Frame, Change of Field, FIFO full, FIFO overrun, DMA transfer done, BT.656 error and AHB bus response error.
- Configurable master clock frequency output to sensor.
- Supports simple deinterlacing of interlaced input.
The IMX8M Plus SoC (GW74xx) in addition to the above has an integrated Image Signal Processor (ISP) and can handle additional input bandwidth for larger resolutions/framerate.
CMOS image sensors are separated into two classes, dumb and smart. Dumb sensors are those that support only traditional sensor timing (Vertical SYNC and Horizontal SYNC) and output only RGB, YUV, and Bayer and statistics data, while smart sensors support ITU-R BT.656 video decoder formats and perform additional processing of the image (for example, image compression, image pre-filtering, and various data output formats). Statistics only work for Bayer data is 8-bit per pixel format.
Note that often you will need to increase your systems CMA allocation to capture. This is evident by 'cma: cma_alloc' error messages. The amount to specify can depend on your kernel version, the media pipeline and the resolution you are capturing. The default CMA is 32M, try increasing it to 256M if you get cma errors:
u-boot=> setenv bootargs "$bootargs cma=256M"; saveenv
Compatible capture devices
Capture Devices:
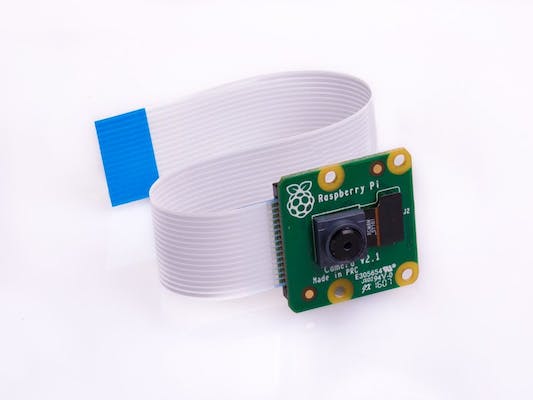
- RaspberryPi Camera Module v2: Sony IMX219 8MP image sensor with RAW8/RAW10 output
- Schematics
- Pin 11 is an active high enable pin which enables on-board 1.8V, 2.8V, 1.2V regulators
- Has its own on-board 24MHz osc
- Requires Gateworks GW16136 Raspberry Pi Adapter board

Kernel Drivers
You must have a driver for both the IMX8M MIPI CSI side as well as the camera sensor:
- 6.6+:
- CONFIG_VIDEO_IMX8_ISI drivers/media/platform/nxp/imx8-isi (i.MX8MP only)
- CONFIG_VIDEO_IMX7_CSI drivers/media/platform/nxp/imx7-media-csi.c
- CONFIG_VIDEO_IMX_MIPI_CSIS drivers/media/platform/nxp/imx-mipi-csis.c
- 6.1:
- CONFIG_VIDEO_IMX_CSI drivers/staging/media/imx/imx7-media-csi.c
- CONFIG_VIDEO_IMX_MIPI_CSIS drivers/media/platform/nxp/imx-mipi-csis.c
- 5.15:
- CONFIG_VIDEO_IMX_CSI drivers/staging/media/imx/imx7-media-csi.c
- CONFIG_VIDEO_IMX7_CSI drivers/staging/media/imx/imx7-mipi-csis.c
- IMX219 Image Sensor:
- CONFIG_VIDEO_IMX219 drivers/media/i2c/imx219.c
Device Tree
To add a device to your system you must properly configure your device-tree to describe how the device is connected to the host processor and other peripherals. Often this is most easily done via a device-tree overlay.
The Gateworks venice kernels have dt overlays that support the IMX219 RaspberryPi v2 camera module on the GW72xx-0x, GW73xx-0x, and GW74xx boards which can be used as examples for other devices.
The dt overlay can be applied to the dt prior to booting the kernel by the Gateworks U-Boot using the 'fdt_overlay' env variable:
- GW73xx imx219 camera:
setenv fdt_overlays imx8mm-venice-gw73xx-0x-imx219.dtbo
saveenv
- GW72xx imx219 camera:
setenv fdt_overlays imx8mm-venice-gw72xx-0x-imx219.dtbo
saveenv
- GW74xx imx219 camera:
setenv fdt_overlays imx8mm-venice-gw74xx-imx219.dtbo
saveenv
Media Controller Pipeline
To use the IMX8M capture devices you must have a media controller device which will appear in /sys/bus/media/devices/ as long as you have the correct drivers available and enabled and everything is configured properly in the device-tree to link the IMX8M MIPI CSI capture device to the image sensor.
This configuration is done in userspace via the v4l2-utils media-ctl application and the Linux media controller API. The pipeline configuration depends on the specific SoC, the image sensor, and how it is connected to the SoC.
Ubuntu Examples to configure the pipeline for 640x480 8-bit ray bayer (RAW8) from the IMX219 image sensor:
- imx8mp-venice-gw74xx-imx219:
# install media-ctl tool
apt update && apt install -y v4l-utils
# find imx8mp media device (FSL Capture Media Device)
MDEV=$(for i in `ls -d /sys/bus/media/devices/media*`; do if [ "$(cat $i/model)" = "FSL Capture Media Device" ]; then cat $i/dev | cut -d: -f2; fi; done)
# find imx8mm video capture device (GW74xx uses CSI0 on the MIPI connector which is mxc_isi.0.capture)
VDEV=$(for i in `ls -d /sys/class/video4linux/video*`; do if [ "$(cat $i/name)" = "mxc_isi.0.capture" ]; then cut -d: -f2 $i/dev; fi; done)
# configure media controller links
media-ctl --device $MDEV --reset
media-ctl --device $MDEV --print-topology
media-ctl --device $MDEV --links "'imx219 3-0010':0->'csis-32e40000.csi':0[1]"
# configure media entities for 8-bit raw bayer 640x480
media-ctl --device $MDEV --verbose --set-v4l2 "'imx219 3-0010':0 [fmt:SRGGB8/640x480 field:none]"
media-ctl --device $MDEV --verbose --set-v4l2 "'crossbar':0 [fmt:SRGGB8/640x480 field:none]"
media-ctl --device $MDEV --verbose --set-v4l2 "'mxc_isi.0':0 [fmt:SRGGB8/640x480 field:none]"
- imx8mm-venice-gw73xx-0x-imx219 and ixm8mm-venice-gw73xx-0x-imx219:
- 6.1+ kernel:
# install media-ctl tool
apt update && apt install -y v4l-utils
# find imx8mm media device (imx-media)
MDEV=$(for i in `ls -d /sys/bus/media/devices/media*`; do if [ "$(cat $i/model)" = "imx-media" ]; then cat $i/dev | cut -d: -f2; fi; done)
# find imx8mm video capture device (csi capture)
VDEV=$(for i in `ls -d /sys/class/video4linux/video*`; do if [ "$(cat $i/name)" = "csi capture" ]; then cut -d: -f2 $i/dev; fi; done)
# configure media controller links
media-ctl --device $MDEV --reset
media-ctl --device $MDEV --print-topology
media-ctl --device $MDEV --links "'imx219 2-0010':0 -> 'csis-32e30000.mipi-csi':0 [1]"
# configure for 640x480 raw8
media-ctl --device $MDEV --verbose --set-v4l2 "'imx219 2-0010':0 [fmt:SRGGB8/640x480 field:none]"
media-ctl --device $MDEV --verbose --set-v4l2 "'csis-32e30000.mipi-csi':0 [fmt:SRGGB8/640x480 field:none]"
media-ctl --device $MDEV --verbose --set-v4l2 "'csi':0 [fmt:SRGGB8/640x480 field:none]"
- 5.15 kernel:
# install media-ctl tool
apt update && apt install -y v4l-utils
# find imx8mm media device (imx-media)
MDEV=$(for i in `ls -d /sys/bus/media/devices/media*`; do if [ "$(cat $i/model)" = "imx-media" ]; then cat $i/dev | cut -d: -f2; fi; done)
# find imx8mm video capture device (csi capture)
VDEV=$(for i in `ls -d /sys/class/video4linux/video*`; do if [ "$(cat $i/name)" = "csi capture" ]; then cut -d: -f2 $i/dev; fi; done)
# configure media controller links
media-ctl --device $MDEV --reset
media-ctl --device $MDEV --print-topology
media-ctl --device $MDEV --links "'imx219 2-0010':0->'imx7-mipi-csis.0':0[1]"
media-ctl --device $MDEV --verbose --set-v4l2 "'imx219 2-0010':0 [fmt:SRGGB8/640x480 field:none]"
media-ctl --device $MDEV --verbose --set-v4l2 "'csi':0 [fmt:SRGGB8/640x480 field:none]"
- 6.1+ kernel:
Capture with v4l
Once you have configured the media pipeline (above) you can configure the appropriate video device for a supported pixel format and resolution and use the Video For Linux (v4l) API to capture:
- configure for 640x480 RRGB
v4l2-ctl --device $VDEV --set-fmt-video=width=640,height=480,pixelformat=RGGB --verbose
v4l2-ctl --device $VDEV --stream-mmap --stream-to=frame.raw --stream-count=1
# install imagemagic for convert tool
apt install -y imagemagick
convert -size 640x480 -depth 8 gray:frame.raw frame.png
Capture with Gstreamer
Once you have proved your video device is configured properly and can capture a frame with the v4l API you can try streaming with Gstreamer:
- capture 640x480 RAW8 at 10fps from IMX219 and display to framebuffer using gstreamer
# install gstreamer
apt update
apt install -y gstreamer1.0-x gstreamer1.0-tools \
gstreamer1.0-plugins-base gstreamer1.0-plugins-good gstreamer1.0-plugins-bad gstreamer1.0-plugins-ugly \
gstreamer1.0-libav gstreamer1.0-gl gstreamer1.0-gtk3 gstreamer1.0-qt5 v4l-utils
# stream 640x480@30fps
gst-launch-1.0 v4l2src device=/dev/video$VDEV ! video/x-bayer,format=rggb,width=640,height=480,framerate=10/1 ! bayer2rgb ! fbdevsink
- use 'glvideosink' if you want to render 'within' an OpenGL GUI or 'fbdevsink' if you want to render to the framebuffer device
- bayer2rgb can't keep up at 640x480@30fps and uses about 25% of the CPU when converting 640x480@10fps (as shown above)
- bayer2rgbneon uses appx 10% of CPU when converting 640x480@30fps
Notes:
- The IMX8MM DSI display driver only accepts RGB pixel format so a pixel conversion must occur if you want to display video from anything that does not output RGB (such as a RAW8 camera or YUV from the VPU decoder). There is no hardware accelerated mem2mem driver at this time (and its not clear if there will be on the IMX8MM). There is a bayer2rgb lib with NEON support and a gstreamer plugin that can be used for RAW8 to RGB:
- https://gitlab-ext.sigma-chemnitz.de/ensc/bayer2rgb
- https://gitlab-ext.sigma-chemnitz.de/ensc/gst-bayer2rgb-neon
# build bayer2rgb lib
apt install -y build-essential git gengetopt autoconf automake autoconf-archive libtool help2man pkg-config
git clone https://gitlab-ext.sigma-chemnitz.de/ensc/bayer2rgb
cd bayer2rgb
autoreconf -i -f
./configure
make
make install
cd ..

# build gstreamer plugin
git clone https://gitlab-ext.sigma-chemnitz.de/ensc/gst-bayer2rgb-neon
cd gst-bayer2rgb-neon
apt install -y libgstreamer1.0-dev libgstreamer-plugins-base1.0-dev
./autogen.sh
./configure
make
make install
gst-inspect-1.0 bayer2rgbneon
Video Decoding
The IMX8MM contains the following hardware
- VeriSilicon Hantro G1 video decoder:
- 1080p60 MPEG2 decoder
- 1080p60 AVC/H.264 Baseline, Main, High decoder
- 1080p60 VP8 decoder
- VeriSilicon Hantro G2 video decoder:
HEVC/VP9 (1080p60)
- 1080p60 VP9 Profile 0, 2 (10 bit) decoder
- 1080p60 HEVC/H.265 decoder
The Linux driver at drivers/staging/media/hantro:
- currently supports:
- G1: MPEG2/VP8/H.264 decode
- G2: HEVC decode
- G2: VP9 decode (Linux 5.17)
- registers both media control devices (/dev/media*) and video4linux devices (/dev/video*):
root@focal-venice:~/# dmesg | grep -i hantro
[    1.505790] hantro-vpu 38300000.video-codec: registered nxp,imx8mm-vpu-dec as /dev/video0
[    1.515788] hantro-vpu 38310000.video-codec: registered nxp,imx8mm-vpu-g2-dec as /dev/video1
root@focal-venice:~/# cat /sys/class/video4linux/video*/name
nxp,imx8mm-vpu-dec
nxp,imx8mm-vpu-g2-dec
root@focal-venice:~/# cat /sys/bus/media/devices/media*/model
hantro-vpu
hantro-vpu
The Hantro G1/G2 decoders are stateless decoders and require the Request API found in modern Linux kernels and a new v4l2codecs plugin to handle 'stateless decoders'. While the v4l2codecs plugin was added in GStreamer 1.18 it has been receiving many updates required for it to work with the Hantro G1/G2 VPU decoder.
It is likely that Gstreamer 1.19 is needed to be able to access the v4l2codec plugin. The following is from a GStreamer 1.19 build using a 5.16 kernel with VPU support and VP9 support backported:
[gst-main] root@focal-venice:~/gstreamer/build# gst-inspect-1.0 v4l2codecs
Plugin Details:
  Name                     v4l2codecs
  Description              V4L2 CODEC Accelerators plugin
  Filename                 /root/gstreamer/build/subprojects/gst-plugins-bad/sys/v4l2codecs/libgstv4l2codecs.so
  Version                  1.19.3.1
  License                  LGPL
  Source module            gst-plugins-bad
  Binary package           GStreamer Bad Plug-ins git
  Origin URL               Unknown package origin

  v4l2slh264dec: V4L2 Stateless H.264 Video Decoder
  v4l2slmpeg2dec: V4L2 Stateless Mpeg2 Video Decoder
  v4l2slvp8alphadecodebin: VP8 Alpha Decoder
  v4l2slvp8dec: V4L2 Stateless VP8 Video Decoder
  v4l2slvp9dec: V4L2 Stateless VP9 Video Decoder

  5 features:
  +-- 5 elements
Note that the Hantro G1/G2 VPU in the IMX8MM outputs raw video in NV12/YUY2/NV12_32L32 pixel formats. Note that IMX8MM MIPI DSI display supports only RGB formats therefore video conversion needs to take place in software in order to 'decode and display.
Examples:
- install Gstreamer:
apt update
apt install -y gstreamer1.0-x gstreamer1.0-tools \
gstreamer1.0-plugins-base gstreamer1.0-plugins-good gstreamer1.0-plugins-bad gstreamer1.0-plugins-ugly \
gstreamer1.0-libav gstreamer1.0-gl gstreamer1.0-gtk3 gstreamer1.0-qt5 v4l-utils
# use fbdevsink if not running a desktop GUI
gst-launch-1.0 videotestsrc ! fbdevsink
# use kmssink for zero-copy DRM/KMS (need to provide caps)
gst-launch-1.0 videotestsrc ! video/x-raw,width=800,height=480,format=BGRx ! kmssink driver-name="mxsfb-drm" force-modesetting=true
# use glimagesink if running in a terminal within a desktop GUI
gst-launch-1.0 videotestsrc ! glimagesink
- VP8 hardware decode and display:
gst-launch-1.0 udpsrc port=9001 caps = 'application/x-rtp, media=(string)video, clock-rate=(int)90000, encoding-name=(string)VP8, payload=(int)96, ssrc=(uint)3363940374, timestamp-offset=(uint)3739685909, seqnum-offset=(uint)28161, a-framerate=(string)30' ! rtpvp8depay ! v4l2slvp8dec ! videoconvert ! fbdevsink
- need videoconvert because vpu src is NV12/YUY2/NV12_32L32 and display only supports BGRx (at this resolution and bitrate CPU is using about 85% idle)
- The caps are taken from the udpsink0.GsdPad:sink: caps from the source
- using kmssink I get 'drmModeSetPlane failed: Invalid argument (22)'
- VP9 hardware decode and display:
gst-launch-1.0 udpsrc port=9001 caps = 'application/x-rtp, media=(string)video, clock-rate=(int)90000, encoding-name=(string)VP9, payload=(int)96, ssrc=(uint)1956992802, timestamp-offset=(uint)828951387, seqnum-offset=(uint)28536, a-framerate=(string)30' ! rtpvp9depay ! vp9parse ! v4l2slvp9dec ! videoconvert ! kmssink
- need videoconvert because vpu src is NV12/YUY2/NV12_32L32 and display only supports BGRx (at this resolution and bitrate CPU is using about 93% idle)
- The caps are taken from the udpsink0.GsdPad:sink: caps from the source
- H264
gst-launch-1.0 udpsrc port=9001 caps = 'application/x-rtp, media=(string)video, clock-rate=(int)90000, encoding-name=(string)H264, packetization-mode=(string)1, profile-level-id=(string)64001f, sprop-parameter-sets=(string)"Z2QAH6zZQMg9sBagwCC0oAAAAwAgAAAHkeMGMsA\=\,aOvssiw\=", payload=(int)96, ssrc=(uint)2753453329, timestamp-offset=(uint)3593065282, seqnum-offset=(uint)12297, a-framerate=(string)30' ! rtph264depay ! v4l2slh264dec ! videoconvert ! kmssink
- need videoconvert because vpu src is NV12/YUY2/NV12_32L32 and display only supports BGRx (at this resolution and bitrate CPU is using about 90% idle)
- The caps are taken from the udpsink0.GsdPad:sink: caps from the source
- using fbdevsink video looks like it has the wrong colorspace
For the examples above streams were generated on a x86 system using GStreamer software encode:
# vp8 software encode
gst-launch-1.0 -v videotestsrc ! vp8enc ! rtpvp8pay ! udpsink host=192.168.1.22 port=9001
# vp9 software encode
gst-launch-1.0 -v videotestsrc ! 'video/x-raw,width=800,height=480,format=(string)YV12' ! vp9enc ! rtpvp9pay ! udpsink host=192.168.1.22 port=9001
gst-launch-1.0 -v videotestsrc ! vp9enc ! rtpvp8pay ! udpsink host=192.168.1.22 port=9001
# h264 software encode
gst-launch-1.0 -v videotestsrc ! video/x-raw,width=800,height=480 ! x264enc ! rtph264pay ! udpsink host=192.168.1.22 port=9001
- for VP9 vp9parse is required as the new stateless decoder handle frames, while VP9 have this notion of superframe. vp9parse will seperate the frames from the super frames.
Notes:
- The DSI display driver only accepts RGB pixel format so a pixel conversion must occur if you wish to display video from from the VPU which can only output NV12/YUY2/NV12_32L32. There is no hardware accelerated mem2mem driver at this time (and its not clear if there will be on the IMX8MM). There is a libneon and bayer2rgb neon project with a gstreamer plugin that can be used:
- While GStreamer 1.18 introduced the
v4l2codecsplugin required to use the VPU it has been getting a lot of additional features and bugfixes that are required. Therefore you need to use either a development build or wait for a packaged GStreamer 1.20 release. To build a development build see gstreamer
Video Encoding
The IMX8MM contains the following hardware
- VeriSilicon Hantro H1 video encoder: VP8/H.264 (1080p60)
The Linux driver at drivers/staging/media/hantro currently do not have support for the IMX8MM Hantro H1 VPU
Notes:
- Hantro H1 VPU supports VP8/H.264/MVC video encode but kernel support is still missing
- You can derive support from RK3288 support using Google ChromeOS method (a v4l2 plugin that simulate in userspace a stateful encoder):
Audio
Please see venice/mipi to leverage audio off the mipi header on the Venice SBCs.
USB audio is always an option and most chipsets will work with basic linux tools such as aplay and arecord.
Example below with Bus 002 Device 002: ID 046d:0a7a Logitech, Inc. Logi USB Headset
Example below playing basic audio file over usb audio:
root@noble-venice:~# aplay -l
**** List of PLAYBACK Hardware Devices ****
card 1: Headset [Logi USB Headset], device 0: USB Audio [USB Audio]
  Subdevices: 1/1
  Subdevice #0: subdevice #0
root@noble-venice:~# aplay -D sysdefault:CARD=1 /usr/share/sounds/alsa/Rear_Center.wav
Playing WAVE '/usr/share/sounds/alsa/Rear_Center.wav' : Signed 16 bit Little Endian, Rate 48000 Hz, Mono
Example below Record wav file from USB microphone and then play back:
root@noble-venice:~# arecord -l
**** List of CAPTURE Hardware Devices ****
card 1: Headset [Logi USB Headset], device 0: USB Audio [USB Audio]
  Subdevices: 1/1
  Subdevice #0: subdevice #0
root@noble-venice:~# arecord -D sysdefault:CARD=1 -f cd -d 10 -t wav /tmp/foo.wav
Recording WAVE '/tmp/foo.wav' : Signed 16 bit Little Endian, Rate 44100 Hz, Stereo

^CAborted by signal Interrupt...
arecord: pcm_read:2240: read error: Interrupted system call
root@noble-venice:~# aplay -D sysdefault:CARD=1 /tmp/foo.wav
Playing WAVE '/tmp/foo.wav' : Signed 16 bit Little Endian, Rate 44100 Hz, Stereo
root@noble-venice:~#
Attachments (1)
- rpicam.jpg (12.4 KB ) - added by 3 years ago.
Download all attachments as: .zip