
| Version 2 (modified by , 8 years ago) ( diff ) |
|---|

Getting Started with a Gateworks SBC
Welcome! Thank you for purchasing a Gateworks single board computer (SBC). We hope to get you started with a little bit of info from our Gateworks wiki site.
Gateworks single board computers (SBC) are powerful, low power network processor boards that are unlimited in their capabilities. Typically, they run a version of Linux called OpenWrt by default, and thus a lot of information is devoted towards configuring and using the OpenWRT software. Because OpenWrt is open source, Gateworks encourages customers to also leverage the open source community of OpenWrt on the web! The Ventana & Newport family also supports other BSPs that can be found on the Ventana Product Wiki Page & Newport Product Wiki Page.
We highly encourage you to utilize this wiki (How to Use Gateworks Wiki) after getting your single board computer turned on with the step by step instructions below.
Software Update
The Gateworks SBC is shipped with software pre-installed. However, software is continually being enhanced and improved. Gateworks recommends reviewing the latest versions compared to what is already installed and updating accordingly.
Required items
To get started and get connected to your board you will need:
- Gateworks Single Board Computer
- Power supply (there are many options here, please use the supply sent with the development kit to get started)
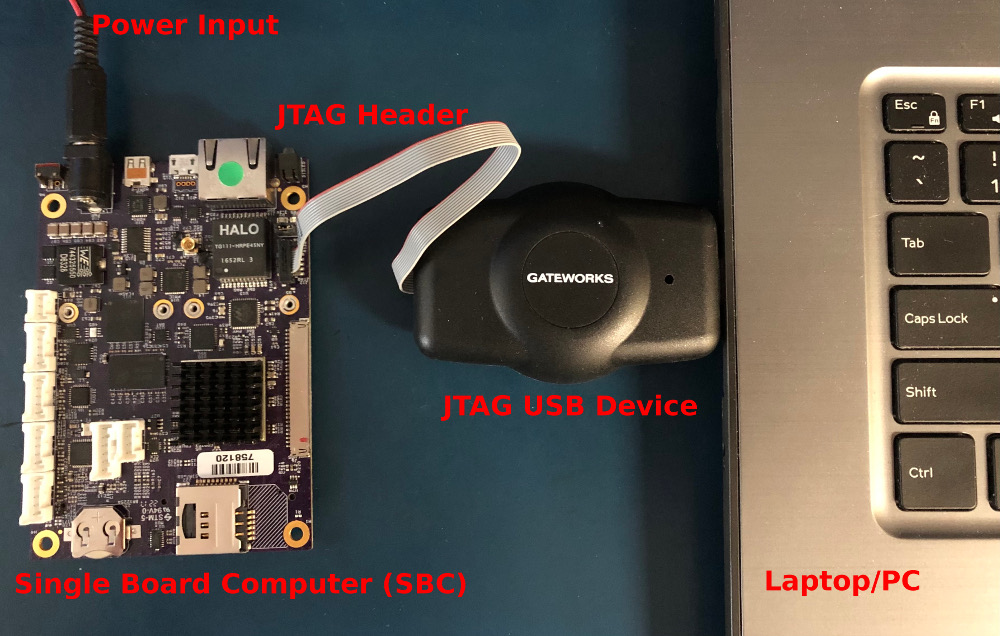
- JTAG USB Programmer - not required but VERY helpful. Used for programming board and serial console access. (Included in development kit) More info on JTAG here
- A computer, preferably a Linux machine such as Ubuntu. Windows will also work.
Optional:
- Operating Manuals are also available online at http://www.gateworks.com/usermanuals which contain very helpful information.
- Software - Firmware image - (Note: Your board comes with the firmware pre-installed, so you may be able to skip this step. ), typically OpenWRT, the Linux distribution that Gateworks runs on the SBC (single board computers) OpenWrt- either download a pre-built binary from our website, or compile your own (Linux only).
- Pre-built binaries can be found on each family's respective page: See here
- Building / Compiling firmware:
Physical Connections
There are two main connections to the single board computer ( SBC ).
- Power
- Communication
Power
- Most Gateworks' boards support voltages between 10VDC - 48VDC. Please consult the operating manual.
- If a development kit was purchased, a 12V or 24V DC Wall supply is included that will connect to the power connector barrel jack on the GateworksSBC.
- Some boards require a 2 pin specialty connector. Silkscreen labels are often labeled VIN for voltage input.
- POE is possible on certain models. 802.3af is available on certain models. Passive POE between 10-48VDC is often supported. Please consult the user manual. POE Information
Communication
- USB JTAG Programmer - This is the method most preferred and used most often at Gateworks Headquarters. - Serial console access can be achieved through this programmer.
- Most boards typically have one ethernet port. Boards with two ethernet ports, the left port is typically the main use port.
- Serial Cable - Certain boards have a serial DB9 connector that will allow access to a console.
Example Configuration:

See also:
First Steps
Steps to get to a command prompt on the board:
- CHOOSE one communication option below and install:
- Serial Console / JTAG - Often preferred because network configuration is not required.
- Please go through the setup instructions for connecting the USB JTAG Programmer to a Host PC. Serial / Jtag Page Here
- Serial console is achieved through JTAG Programmer (Or DB9 connector if available)
- GUI Login in any web browser (by default ip is 192.168.1.1)
- Telnet (use command line, ex: putty for windows, shell for linux ie: telnet 192.168.1.1)
- SSH (example: ssh root@192.168.1.1)
- Serial Console / JTAG - Often preferred because network configuration is not required.
- Be sure all software is configured, setup, installed, and open on the host PC (for example, drivers installed, com port identified, etc).
- Connect: the communication cables, such as the JTAG cable or an ethernet cable or serial cable.
- Connect power.
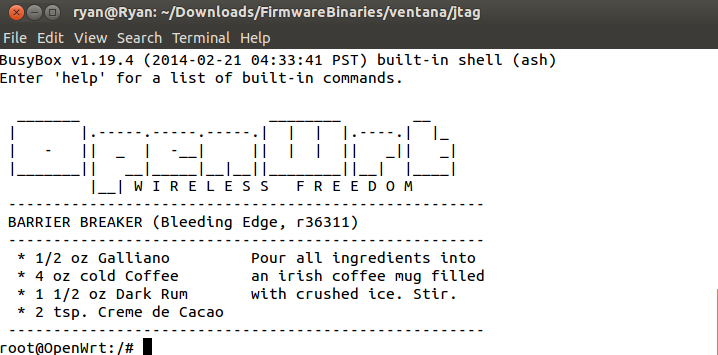
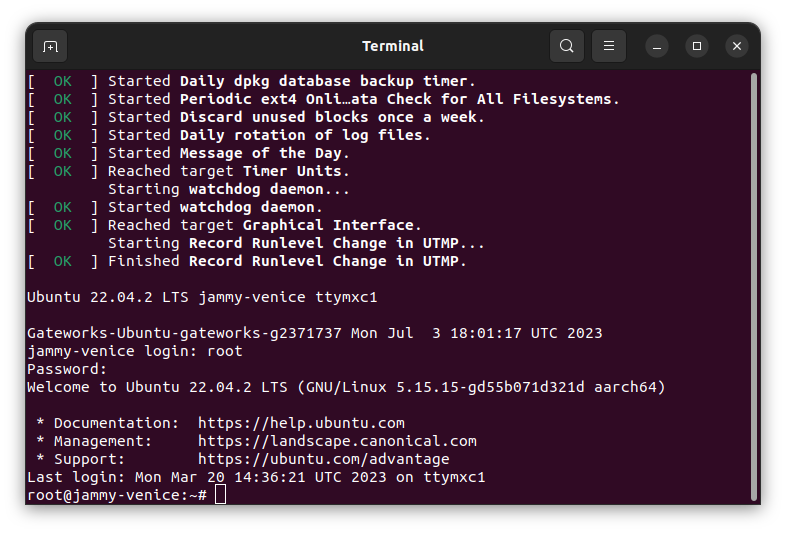
- The board will start outputting text out of the serial console. If a network connection method is being used, please wait a few seconds until a network connection is attempted.
- Yocto OS Login: root
- See example picture below:

Installing Firmware
Gateworks Boards are shipped with a default firmware pre-installed, but if you want a specific BSP or version, or want to ensure you have the latest firmware you can update it in a couple different ways:
- JTAG: Flash your board with binary image from a binary listed in step above or the one you compiled using a USB JTAG Programmer and these JTAG Instructions
- TFTP Ethernet: as detailed here (bootloader specific):
Next Steps
Now that you can login to the board, the options are unlimited! Start using the Gateworks board for your intended use!
There is lots of great information on the Gateworks Software Wiki homepage pointing to many examples, hints, tips, and tricks!
Please use the search box in the top right hand corner as well! Product Manuals are also available online at http://www.gateworks.com/usermanuals which contain very helpful information.
Feel free to contact us for any support at support@…
Attachments (6)
- VentanaJTAG.jpg (204.1 KB ) - added by 9 years ago.
- gw5100actual.png (109.9 KB ) - added by 9 years ago.
- prompt.png (41.1 KB ) - added by 9 years ago.
- jtag_setup.jpg (201.2 KB ) - added by 5 years ago.
-
grounding.png
(90.6 KB
) - added by 5 years ago.
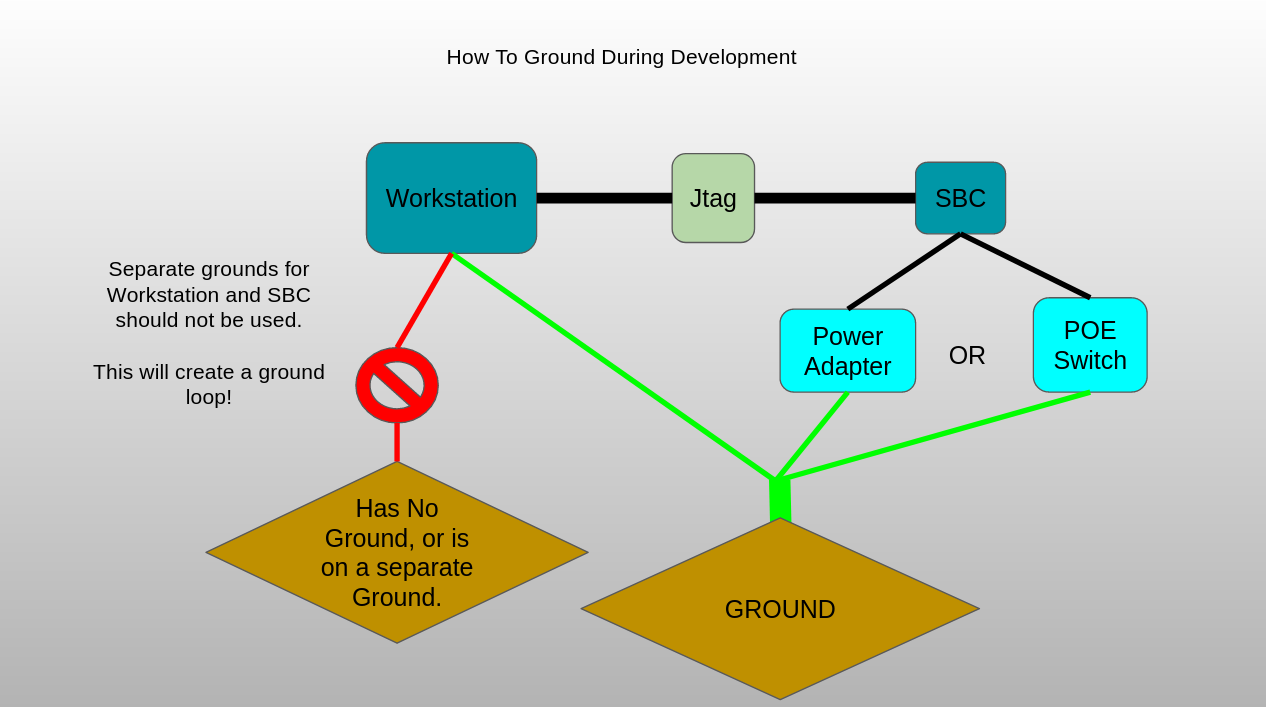
grounding
-
screen-verification.png
(101.5 KB
) - added by 3 years ago.
Ubuntu Jammy, Venice SBC
Download all attachments as: .zip